The pump will arrive assembled so the first step will be to disassemble the Willow Go™, clean and boil the washable parts for 5 minutes and allow to air dry.
To disassemble, follow these steps:
- Gently pull to remove the flange
- Press the two buttons on the sides to remove the container
- Pry apart the container back
- Pull off the duckbill
- Pop out the diaphragm
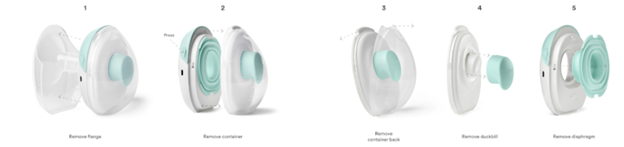
Assembling Willow Go™ is easy - just six parts, stack them together and then press to secure.
Read further to see pro tips about assembly sounds, the correct order of assembly, and the importance of a firm squeeze at the end to get the best pumping experience.
Pro Tip #1
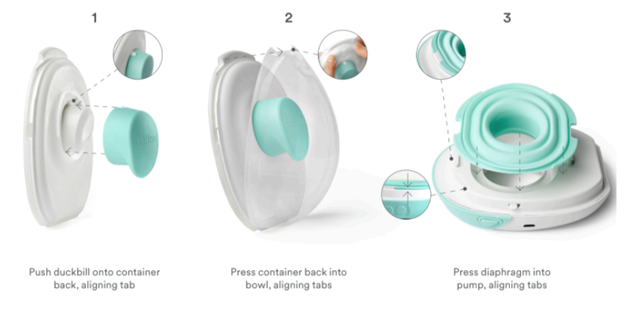
Listen for a pop when you press the diaphragm into the pump (Step 3 above) so you know it has been assembled correctly. You can hear an example of the “popping” sound in the below video. This step is very important for proper suction.
 How to Place Your Diaphragm
Pro Tip # 2
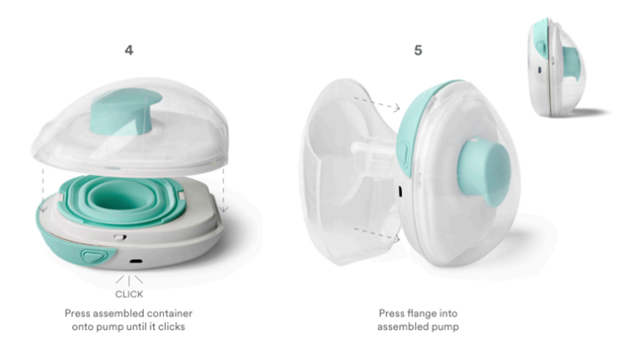
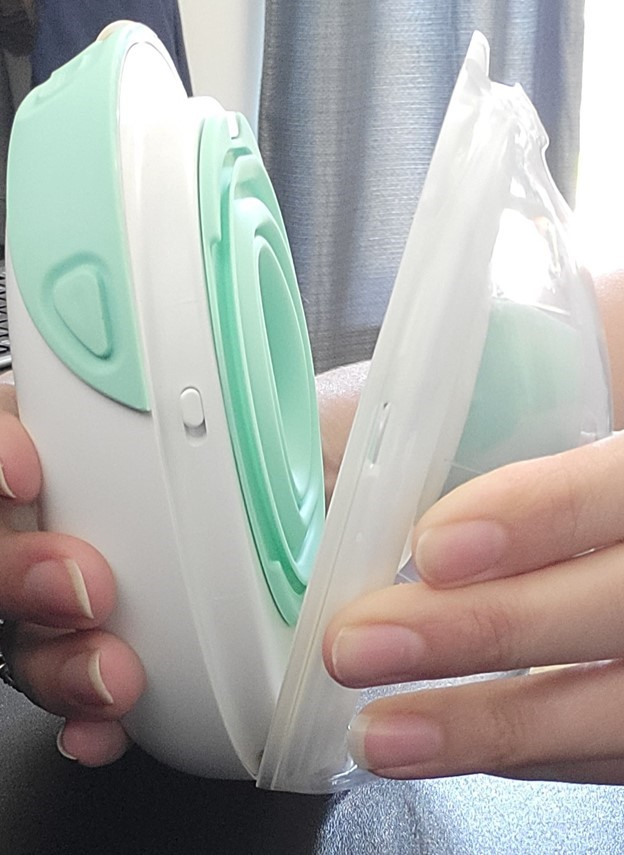
Listen for one, unified click as you pull the assembled container straight onto the pump (Step 4 above). If you hear one side clicking in after the other, pull the assembled container from the pump, check that the diaphragm is straight with both tabs lined up, and click together again. You can also try pressing the container onto the pump from bottom to top (think of a clam shell - see image below). This helps prevent the diaphragm from shifting or pinching.
Pro Tip #3
Some Moms find it faster and easier to assemble the bowl to the container back by first anchoring the cut out at the top of the clear bowl to the tab on the top of the container back. Once those are aligned, press the whole thing together top to bottom.

Pro Tip #4
Assemble the flange last. Many moms feel assembling the flange last makes it feel most secure and it tends to remain in place more reliably throughout a pumping session. When pushing the flange in last, make sure to squeeze it firmly together so the air vent at the top of the flange can emerge into the container back and duckbill allowing the air to flow freely and milk to flow into the container.
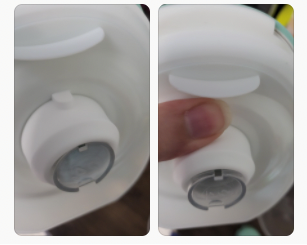
*Image shown is for visual purposes without the duckbill on, this step will not be visible during assembly when putting the flange in last
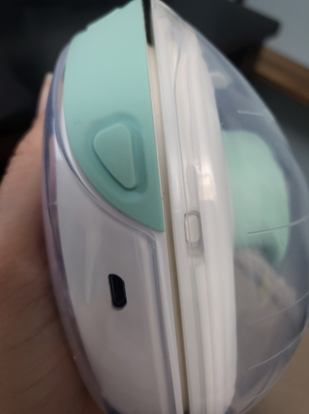
Notes: The small hole (pour spout) on your pump is used to create suction while pumping. Make sure to keep fluid away! A splash guard is positioned directly beneath the pour spout to reduce the likelihood of milk splashing out during activities. A 7-ounce container is also available for purchase which can reduce splashing as well. Plugging the pour spout to prevent spilling while moving may make it hard for your pump to function properly and may cause your pump to overheat. Once assembled, the small gap shown in the image below between the container back and the pump is 100% normal. Your milk will collect in the container assembly, so take the time to press the container back securely onto the container bowl. A gap in the container assembly may cause leaks.